Most Minecraft domes fail the same way — one ring comes out a block too wide, the next sits lopsided, and the smooth curve turns into a lumpy blob. The fix is not a steadier hand; it is building the dome one ring at a time, with every ring planned before a block goes down.
Table of contents
Open Table of contents
Plan the dome before you place a block
A dome in Minecraft is the bottom half of a sphere — an uncompleted sphere, capped at its widest point. Before any blocks go down, three things need settling: how wide the dome is, how tall, and whether it is hollow.
Width decides whether the shape curves at all. A dome under about 11 blocks across cannot — it comes out as a few stacked steps that read like an odd pitched roof instead of a dome. Diameter 13 to 21 is the reliable everyday range; 25 to 31 is where the curve turns genuinely smooth for a grand build. Height follows from width — a dome stands about half its diameter tall, so a 21-wide dome needs roughly 11 blocks of clear space above its floor. Match the diameter to whatever the dome caps, a wall or a platform or a base, and lock it there first.
Keep the fill mode on hollow for nearly every dome, since the whole point is to stand under it; solid only makes sense for a small decorative cap. With the size settled, open the Minecraft dome generator: it lays the dome out layer by layer and gives an exact block count for every ring, and the size table on that page maps diameters to the builds they suit. Planning here is the entire reason a dome comes out round — you stop guessing each ring and start reading it.
Your base ring sets the shape of the whole dome
The base ring is the widest layer — the full-diameter circle the dome rests on. It is also the one layer you cannot afford to get wrong, because every ring above is measured against it; an error here repeats all the way to the cap.
Mark the center before anything else. An odd diameter — 13, 17, 21 — has a single center block, the easiest case to work with: set that block, build one quarter of the ring, and mirror it around. An even diameter gives a 2×2 center instead, with no single block to pivot on. Either way the ring is a circle, and a circle is far easier built a quarter at a time than traced in one continuous loop — the giant circle alignment guide covers the axis-first workflow in full.
On a large dome you often cannot see clear across the build, and a ring traced blind drifts off by a block before you notice. Lay straight axis lines out from the center first and build the ring against them; the giant circle alignment guide walks through exactly that. Build the base ring at the height the dome’s floor will sit — on top of a wall, on a cleared platform — since the whole dome rises from it. Finish the whole ring, and check it, before a single block goes higher.
Build upward, one ring at a time
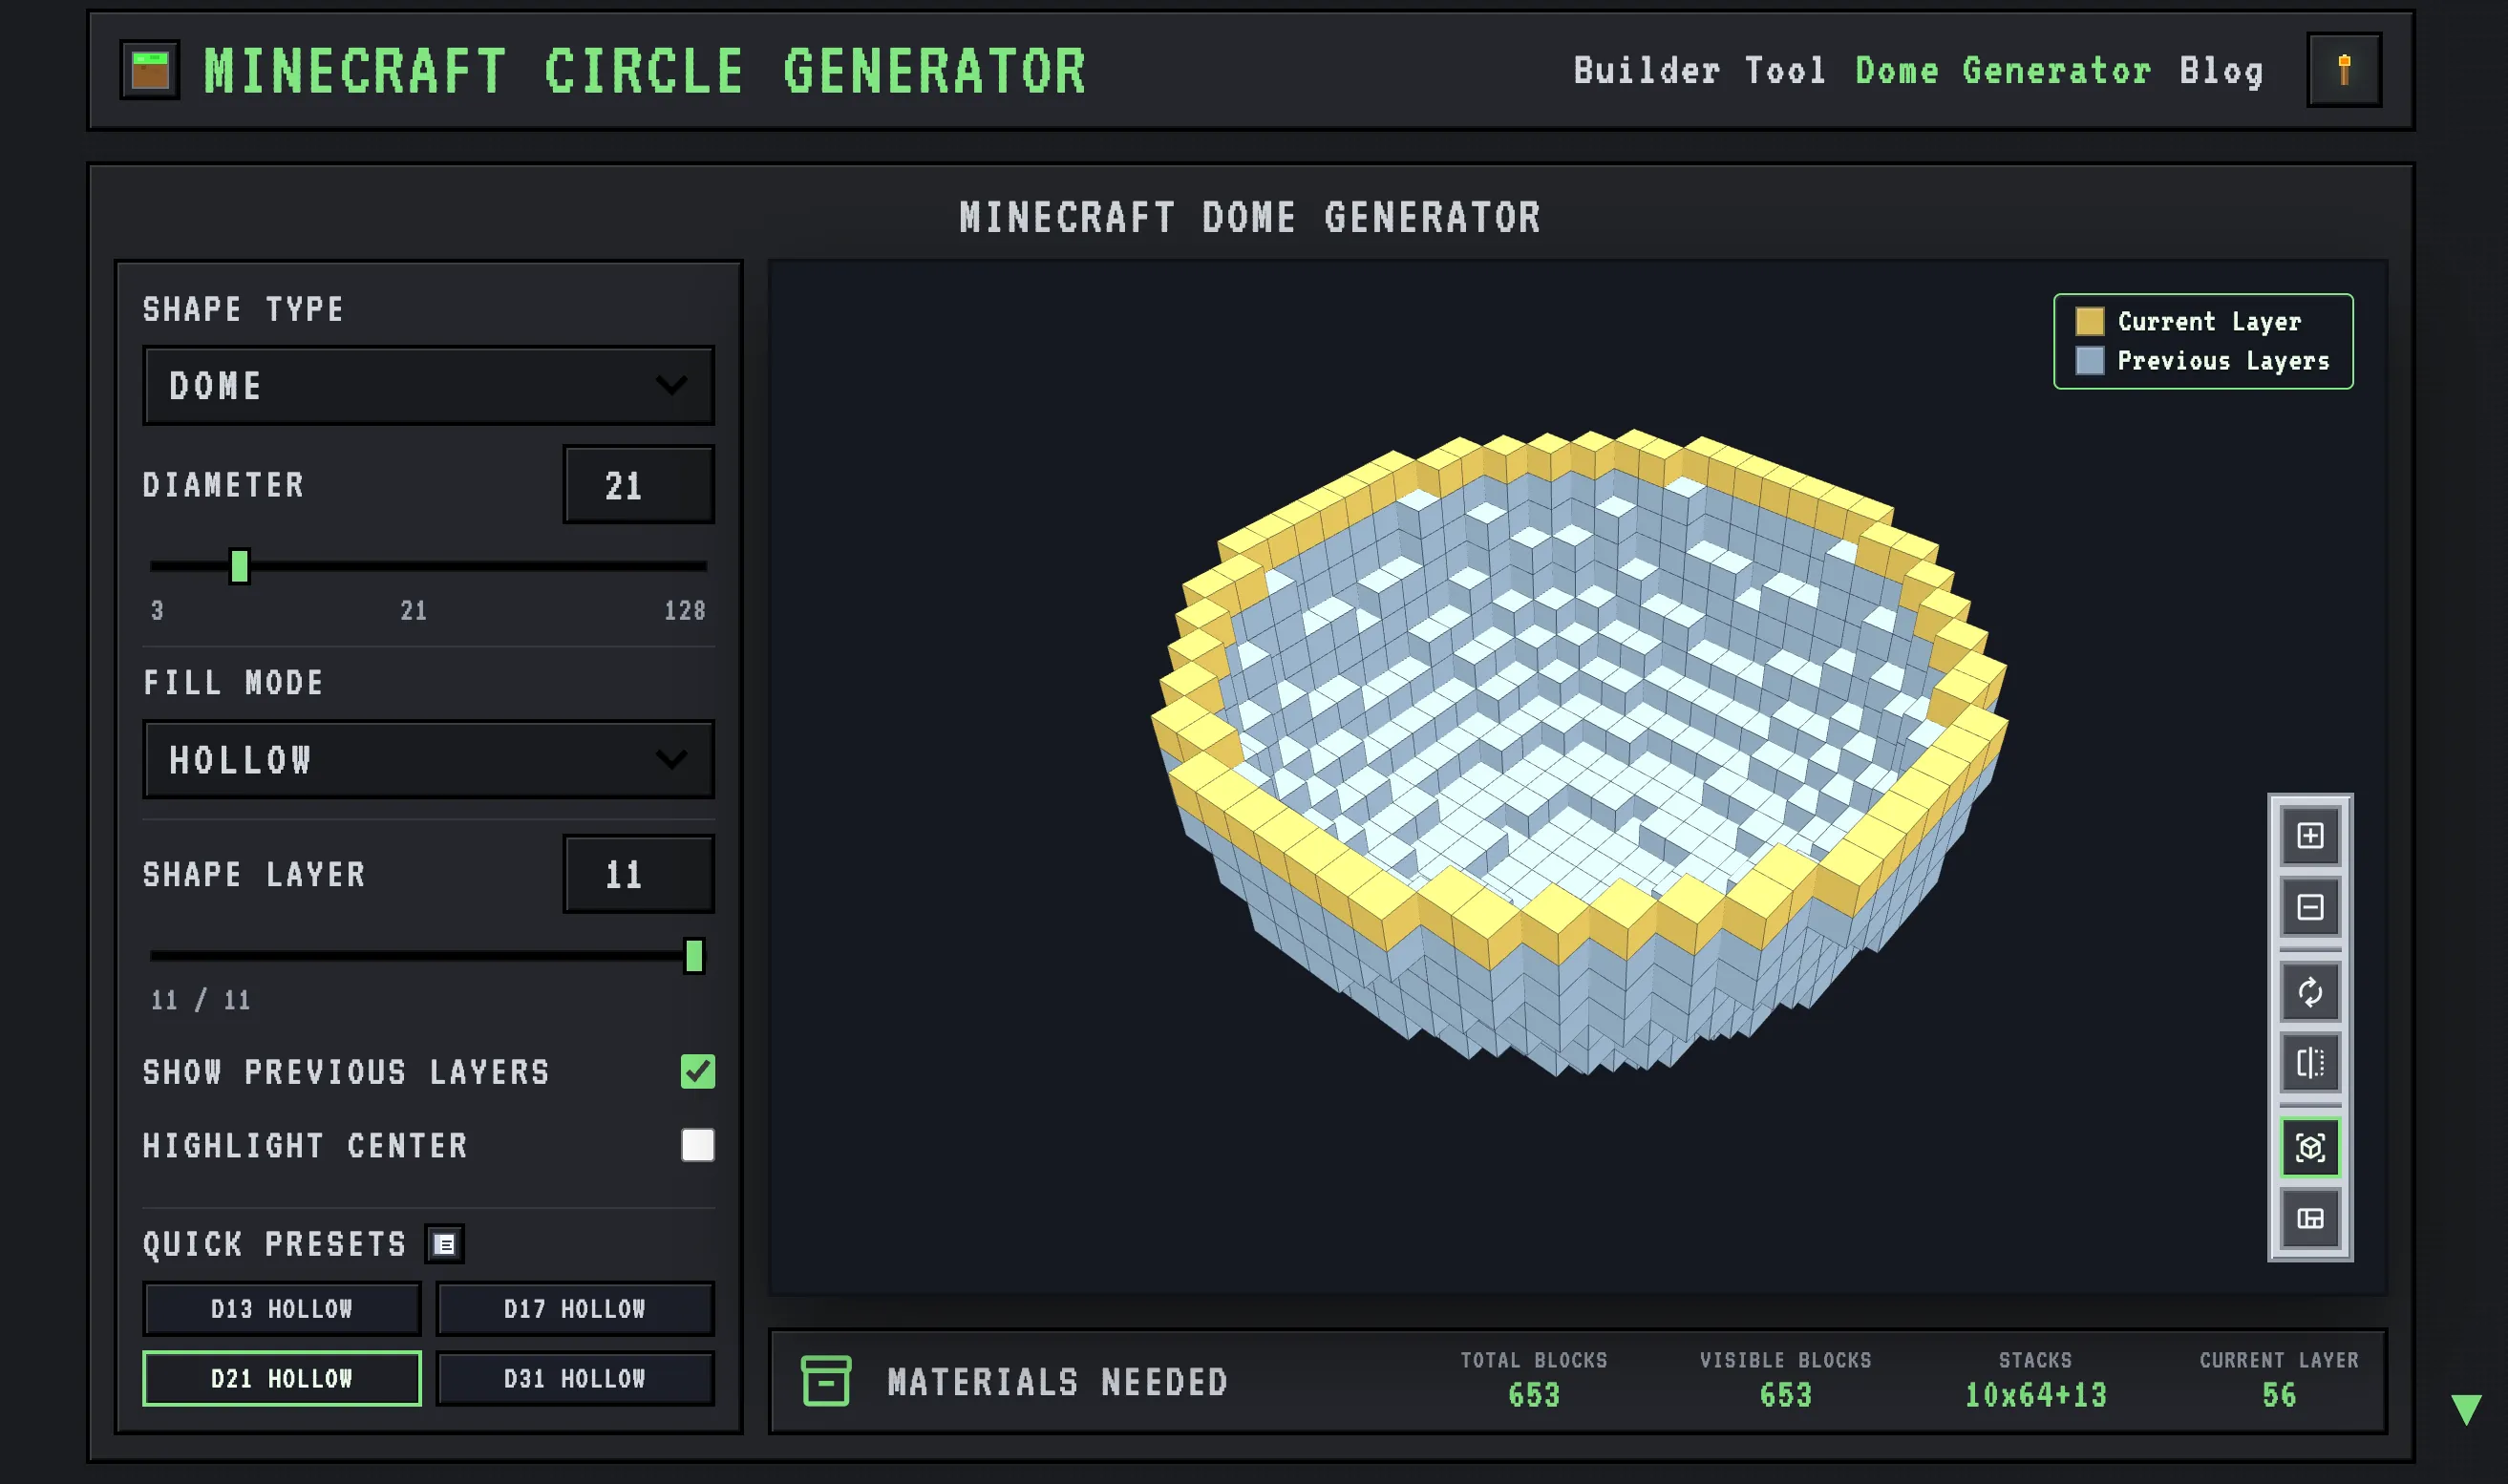
Every ring above the base is a smaller circle. You never carve the dome’s curve by hand — it appears on its own as each ring steps inward by the right amount, and the generator tells you precisely how much.
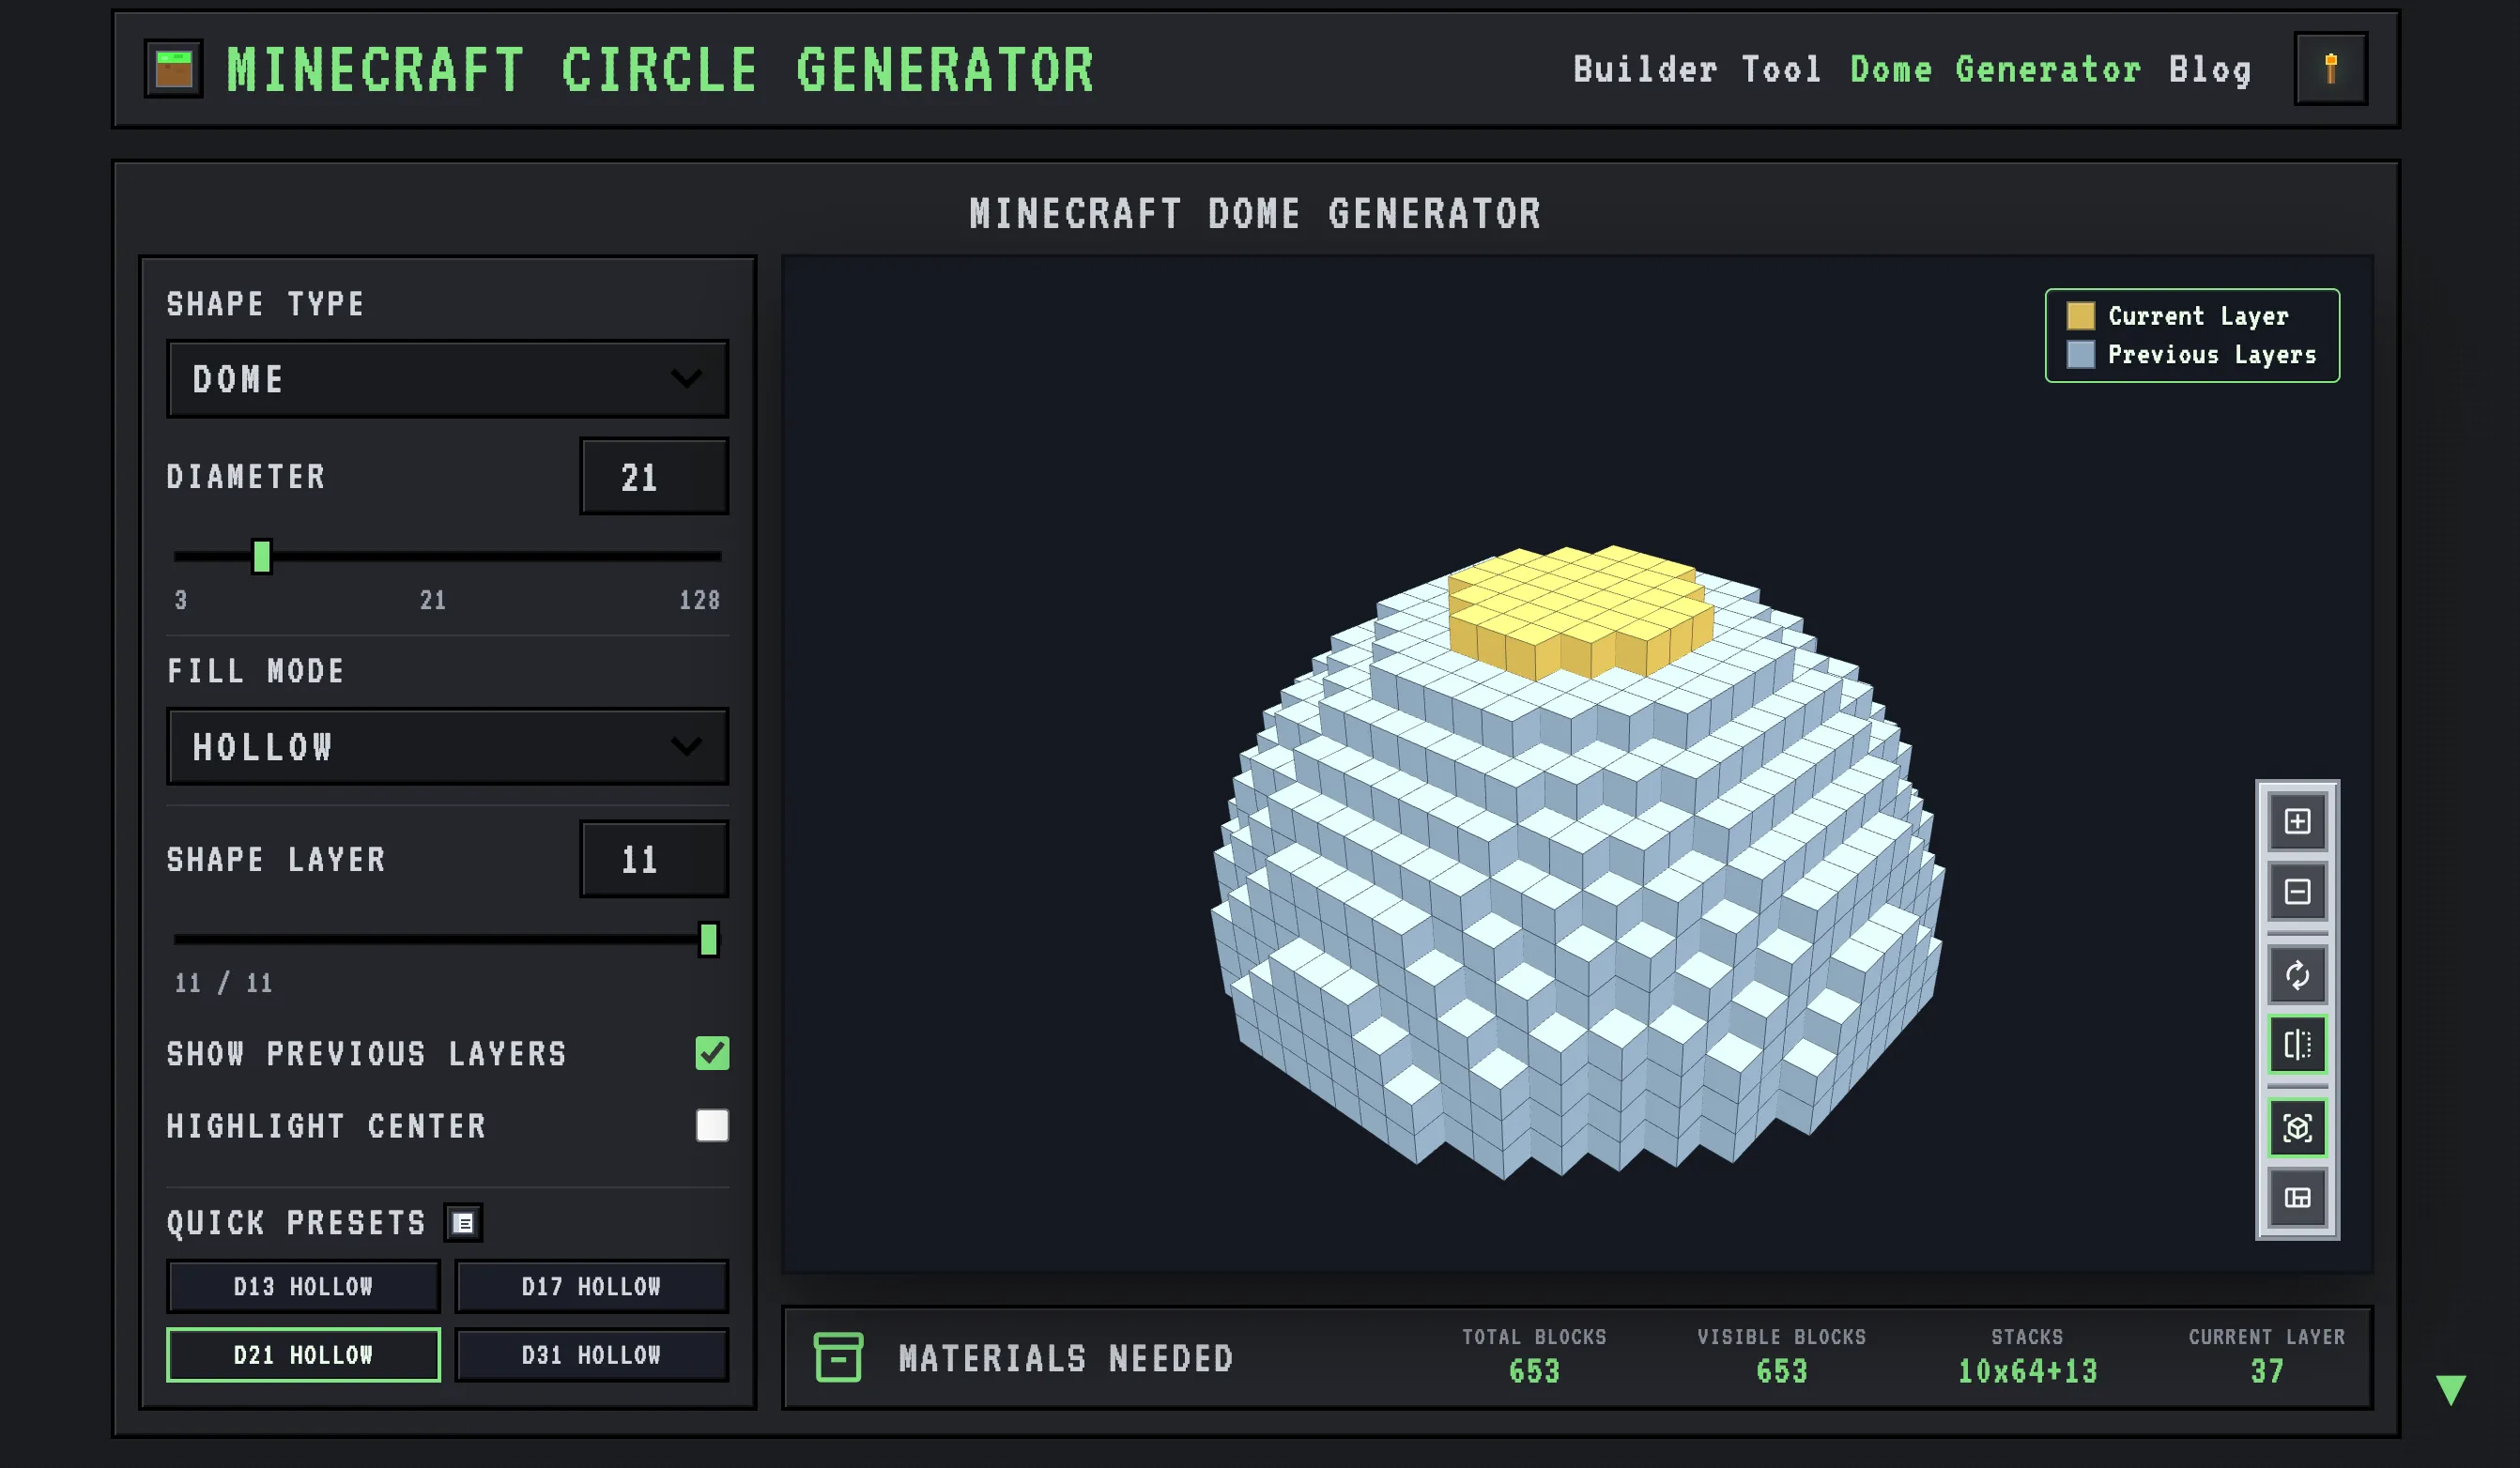
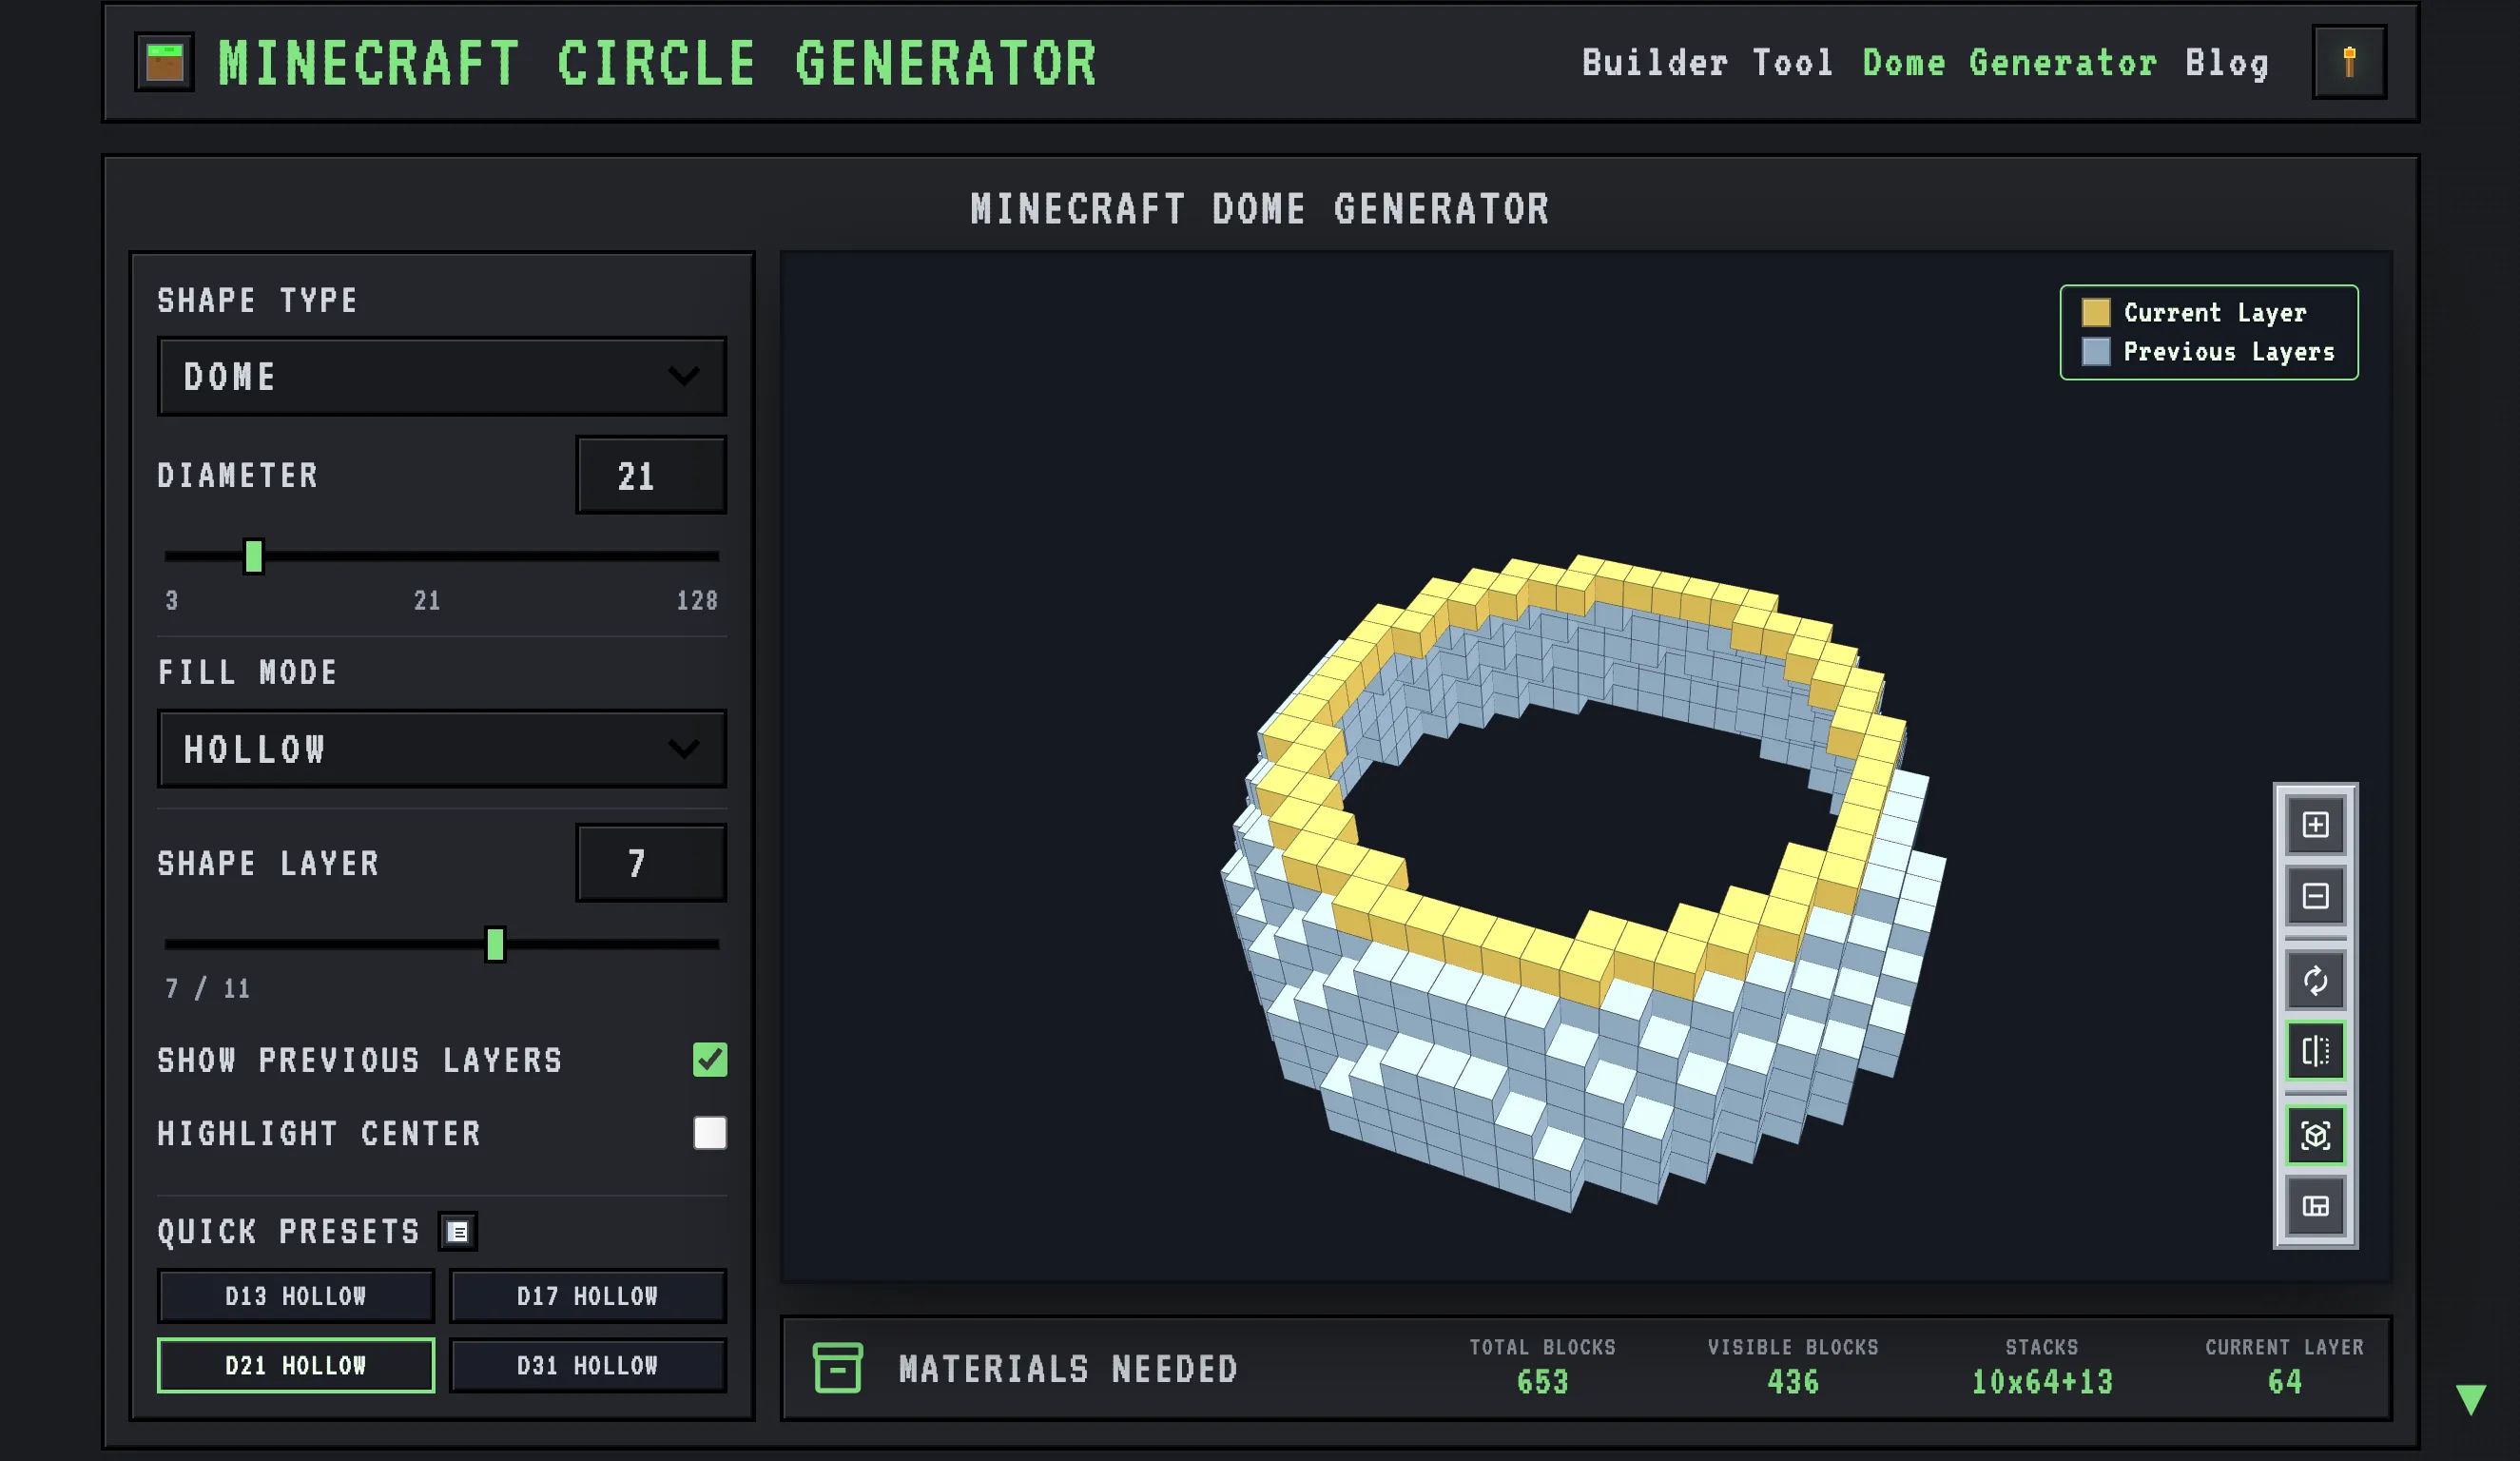
Nudge the generator’s Shape Layer slider up one notch and it shows the next ring: the layer you are placing lit in yellow, the finished layers below it in gray. Leave “Show Previous Layers” switched on — seeing the ring directly below is what keeps the new one aligned. Build the ring, slide up, repeat. On a big dome it is easier to work from inside, standing on the ring you just finished to place the next one above it, with scaffolding for the upper reaches.
Check every ring before you climb past it. The Materials panel gives the block count for the current layer — count what you actually placed and compare. The worst dome I built skipped that check; I found a ring two blocks too wide near the top and lost an evening tearing it back down. A miscount caught at ring four is two minutes of fixing. Caught at the cap, it is the whole dome. To work the totals out before you mine, the sphere block count guide breaks down how the material numbers add up.
Capping the dome, then making it livable
The top rings shrink quickly — the last few are tiny circles, and the very cap is often a single block or a 2×2. Once that is sealed, the shell of the dome is done. The shell can be any block — stone brick or quartz for a solid roof, glass for light — so the material itself is purely an aesthetic call.
A sealed dome is dark inside; it blocks the sky the way any roof does. Light it from within — lanterns, sea lanterns or glowstone set into the shell or hung from the ceiling — and plan that lighting before you close the top, so you are not breaking back in to patch it later. A glass dome, the kind that roofs an observatory or seals an underwater base, lets daylight do most of the work, though night will still want some interior light.
Mind the headroom while you are at it. A dome curves inward as it rises, so the interior is widest at the floor and tightens toward the cap — keep any tall interior build near the center. One honest limit: the generator plans the dome and counts every block, but it does not place anything for you. In survival you still set each block by hand; the tool’s job is only to make sure every one of them lands in the right spot.
Plan the size, get the base ring right, then follow the generator up ring by ring — that is the whole of it. Open the dome generator, set your diameter, and the layer-by-layer blueprint is ready before you place a block.