Have you ever tried to build a 100+ block circle over a mountain or a ravine?
You start building your outer wall, following the curve block by block. But because the terrain blocks your line of sight, you can’t see the other side of your base. By the time you wrap around the mountain and try to connect the two ends of your wall, they don’t meet.
You are a victim of the 1-block drift.
This happens because treating a massive build like a tracing exercise is mathematically dangerous. If you miscount just one block at the start of your curve, that error pushes the entire rest of the circle outward or inward.
To fix this, you have to stop building the perimeter and start building a framework.
Table of contents
Open Table of contents
Why Minecraft Circles Come Out Uneven
A lopsided circle almost always traces back to one of three things:
- You eyeballed the shape. A hand-placed curve is never a true circle — the block ratios have to be exact. If that’s the problem, start with how to make a circle in Minecraft and come back once you’re working from a real blueprint.
- You used an even diameter. Even widths have no single center block, so the four quarters can’t mirror cleanly and one side ends up a block fat. Switch to an odd width and you get a true center to build against.
- The build drifted as it got big. Past roughly 30 blocks you lose line of sight, miscount once, and the whole curve walks off-grid. That’s the 1-block drift — and it’s the cause this guide fixes.
The first two are a five-minute fix. The drift is the one that quietly ruins 100-block mega-builds, so that’s what the rest of this page is about.
The Perimeter Trap
Most pixel-chart sites give you a static 2D image of the circle — no axis guides, no interactive layer, no center marker. A flat snapshot forces you into a terrible habit: starting at the edge and building in a giant continuous loop.
A continuous loop has no anchor points. If you mess up on block 50, you won’t realize it until block 300.
To prevent this, you need visual guidelines that cut straight through the middle of your build, giving you fixed coordinates to check your math against.
The “Red Line” Framework
I designed the MCShapes circle generator to solve this exact alignment problem.
When you open the tool, look at the left panel and turn on the HIGHLIGHT CENTER toggle.
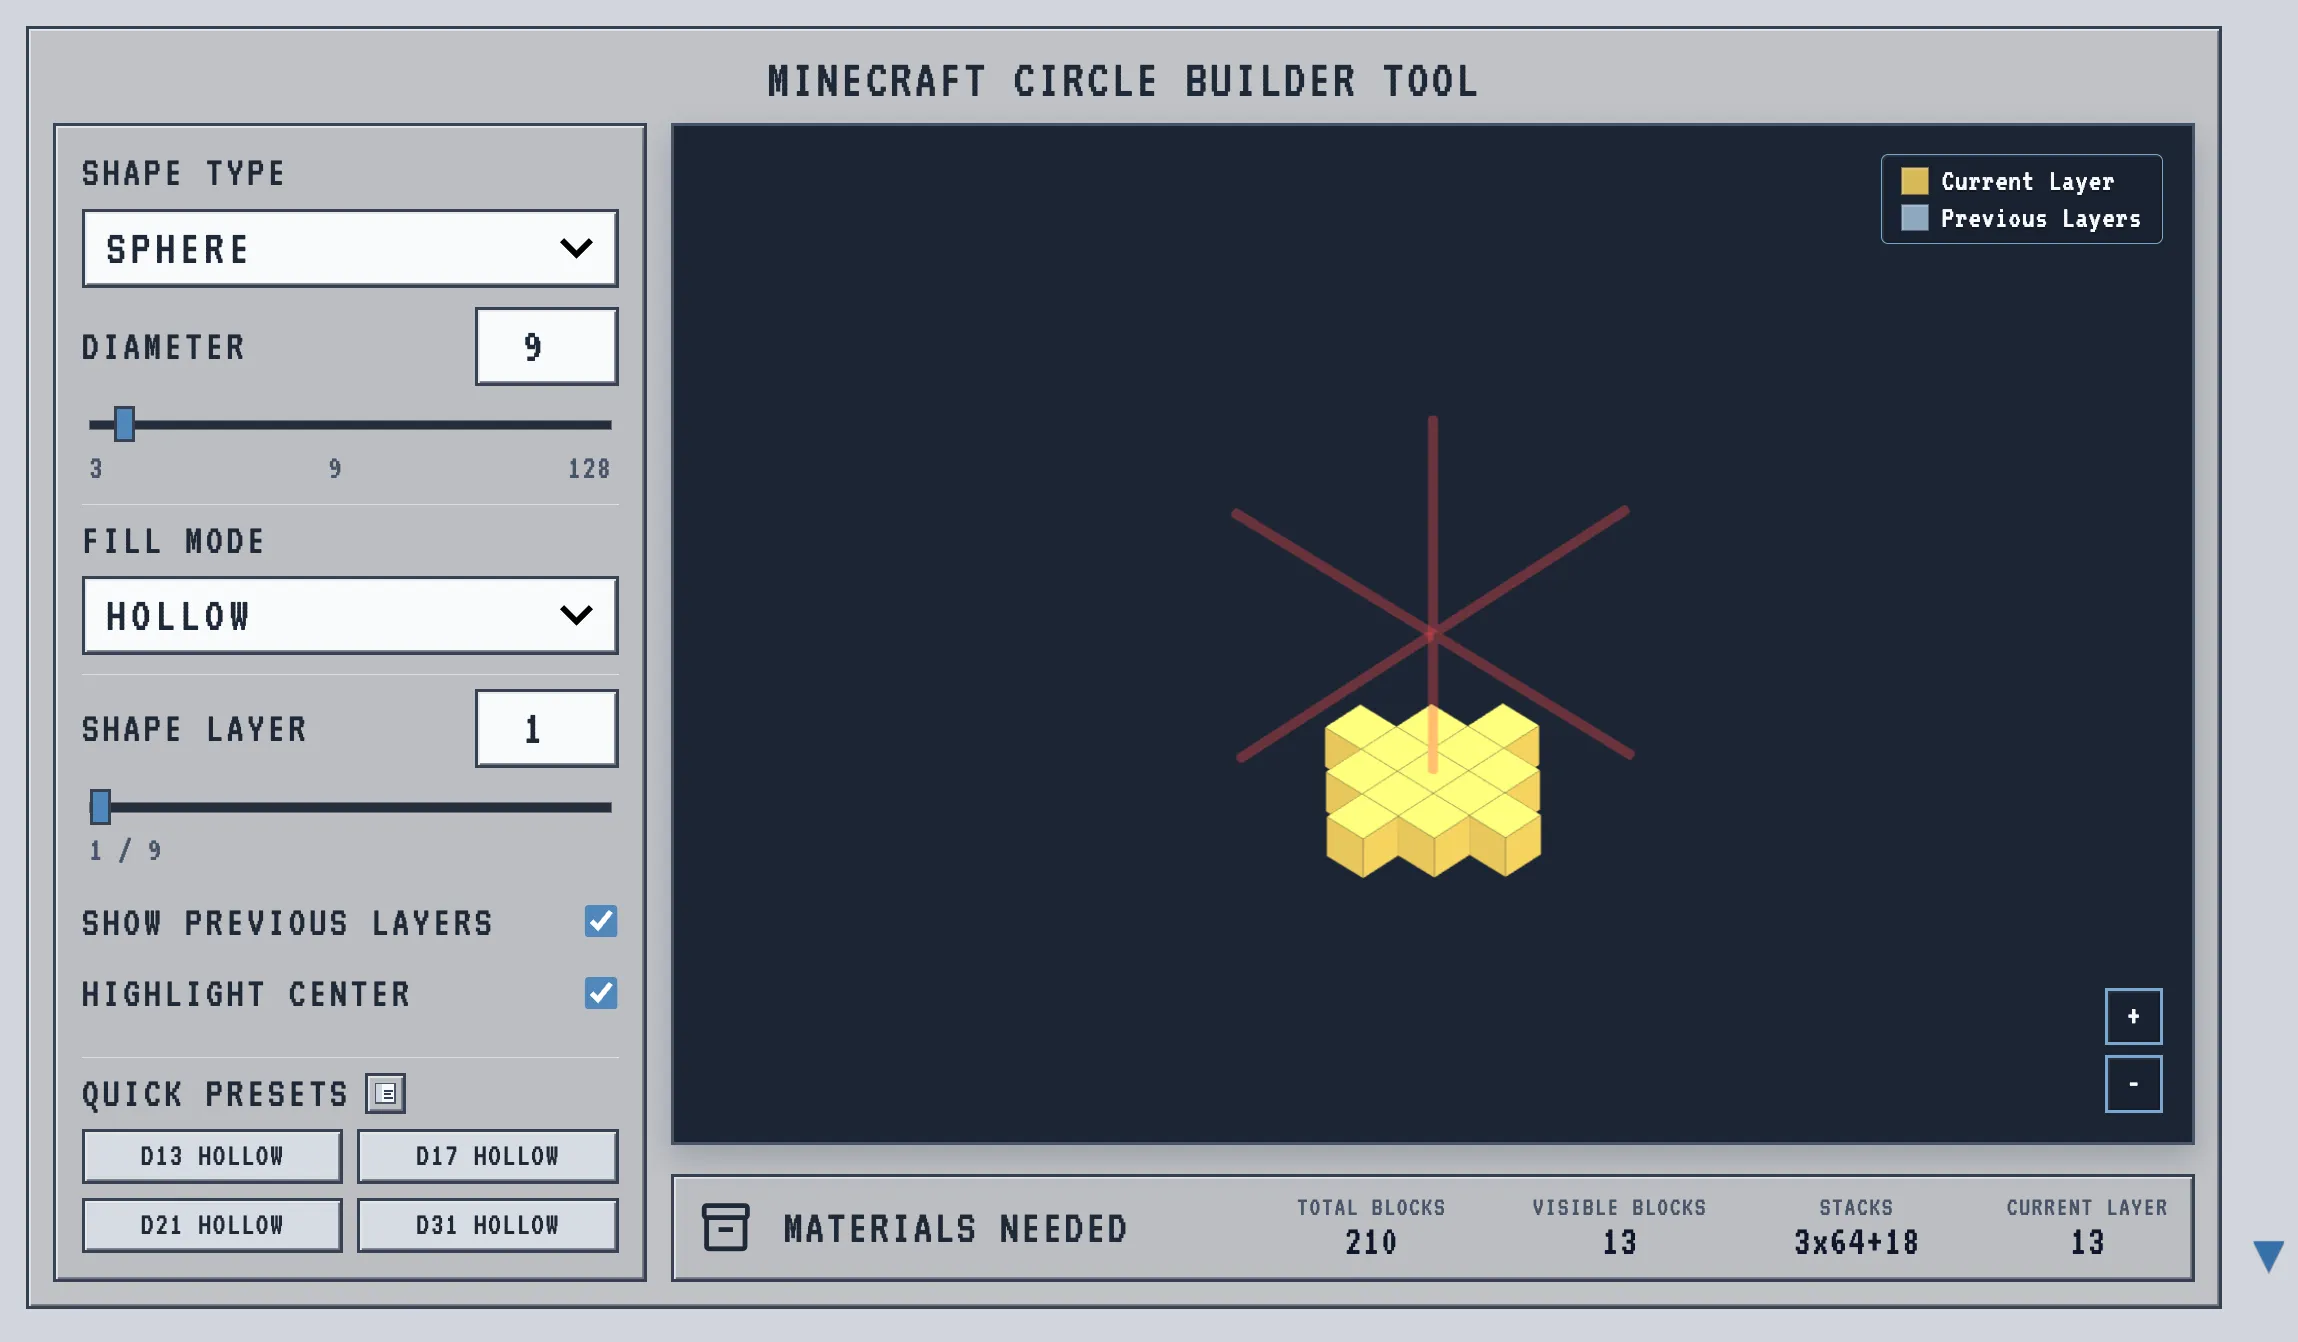
It doesn’t just show you a glowing dot in the middle. It actively projects red X and Z axes through your entire structure. Those red lines are your most valuable building tool. They represent your cardinal directions (North, South, East, West) in your actual Minecraft world.
The “Anchor and Connect” Workflow
Instead of blindly tracing the outside edge, use those red lines to create a skeleton for your build. Here is how you translate the tool into your survival world:
1. Drop the Anchor
Find the exact center of your cleared area. Place a distinct, permanent block there. If you press F3 (on Java) or check your coordinates (on Bedrock), this is your absolute origin point for the build.
2. Shoot the Axes (The Crosshair)
Look at the red lines projecting outward in the tool. Build those exact lines in your game. Place blocks extending straight out from your center anchor in all four directions. You are essentially building a massive plus sign (+) on the ground.
3. Lock the Four Poles
Look at the preview in the generator to see how many blocks make up the “flat” sections at the outermost edges of the circle. Build those specific flat sections at the very ends of your four axis lines.
4. Connect the Dots
You now have four perfectly aligned outer walls locked into your world’s grid. All you have to do is build the curved sections to connect them.
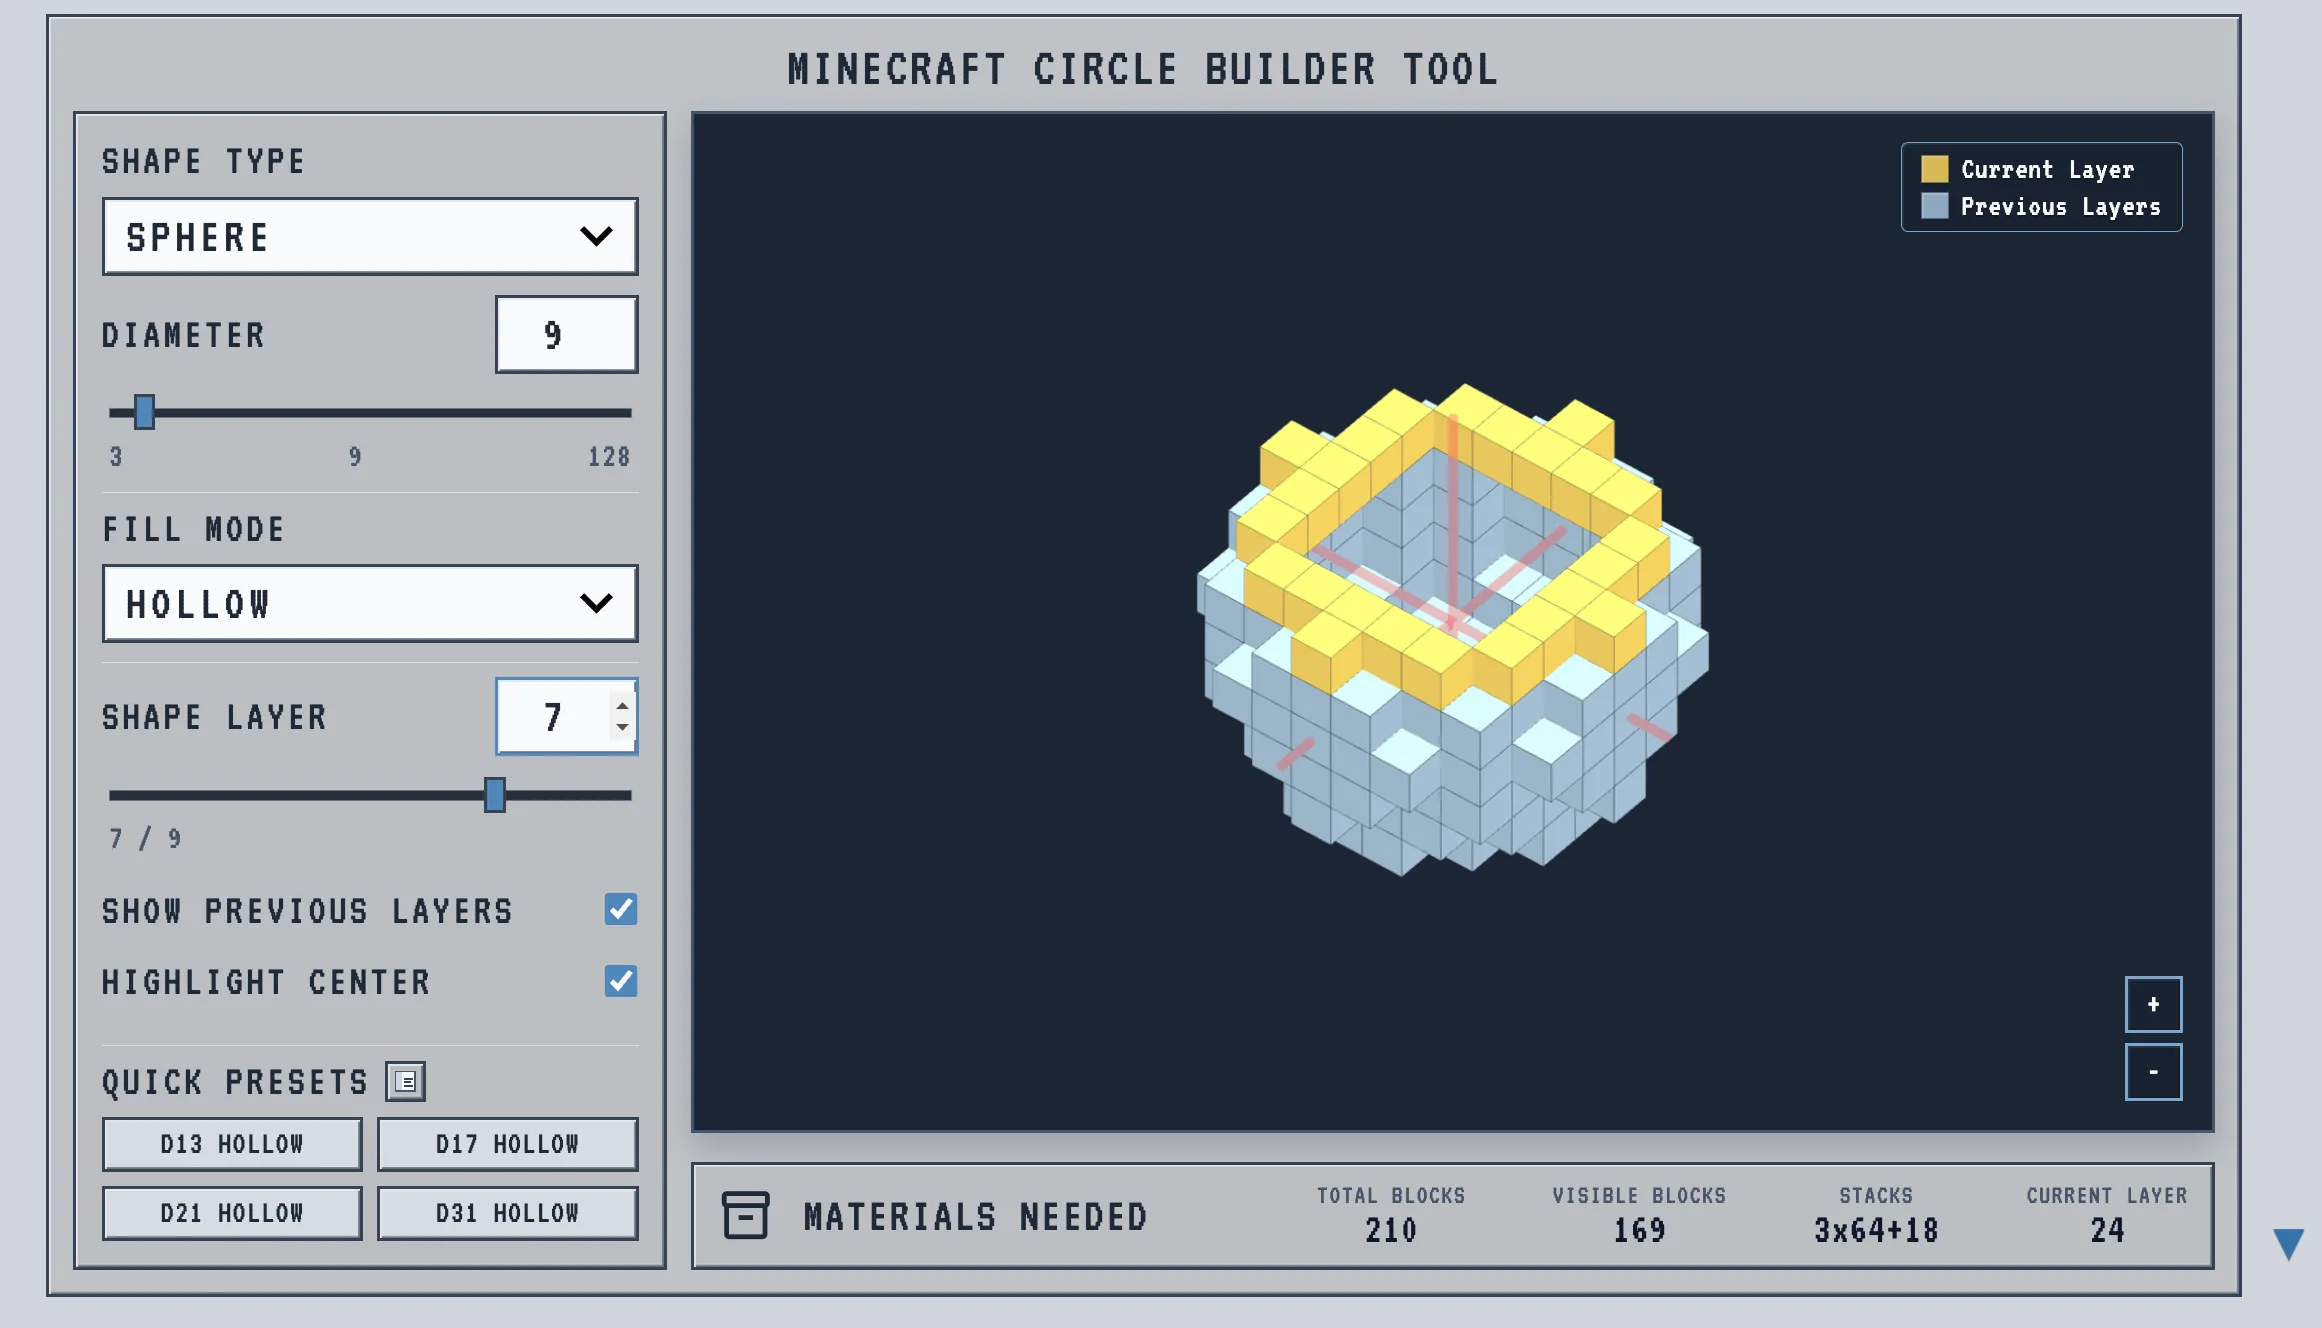
Because you are only building one quarter of the circle at a time, the 1-block drift is impossible. If you make a mistake, it will only affect that specific curve, and you will spot it before you move on to the next section.
Build your axes first, and your circles will never fail to connect again.
The same axis framework carries straight over to ovals. Stacking concentric ellipses off one shared crosshair is exactly how you keep the tiered seating aligned when you build a Roman colosseum — the drift problem is identical, and so is the fix.