Search “minecraft colosseum” and half the tutorials open by laying out a circle. That’s the first mistake. The Roman Colosseum is an oval — roughly 188 meters by 156 — and that stretched shape is the whole reason the floor has room for a fight while the stands wrap in tight around it.
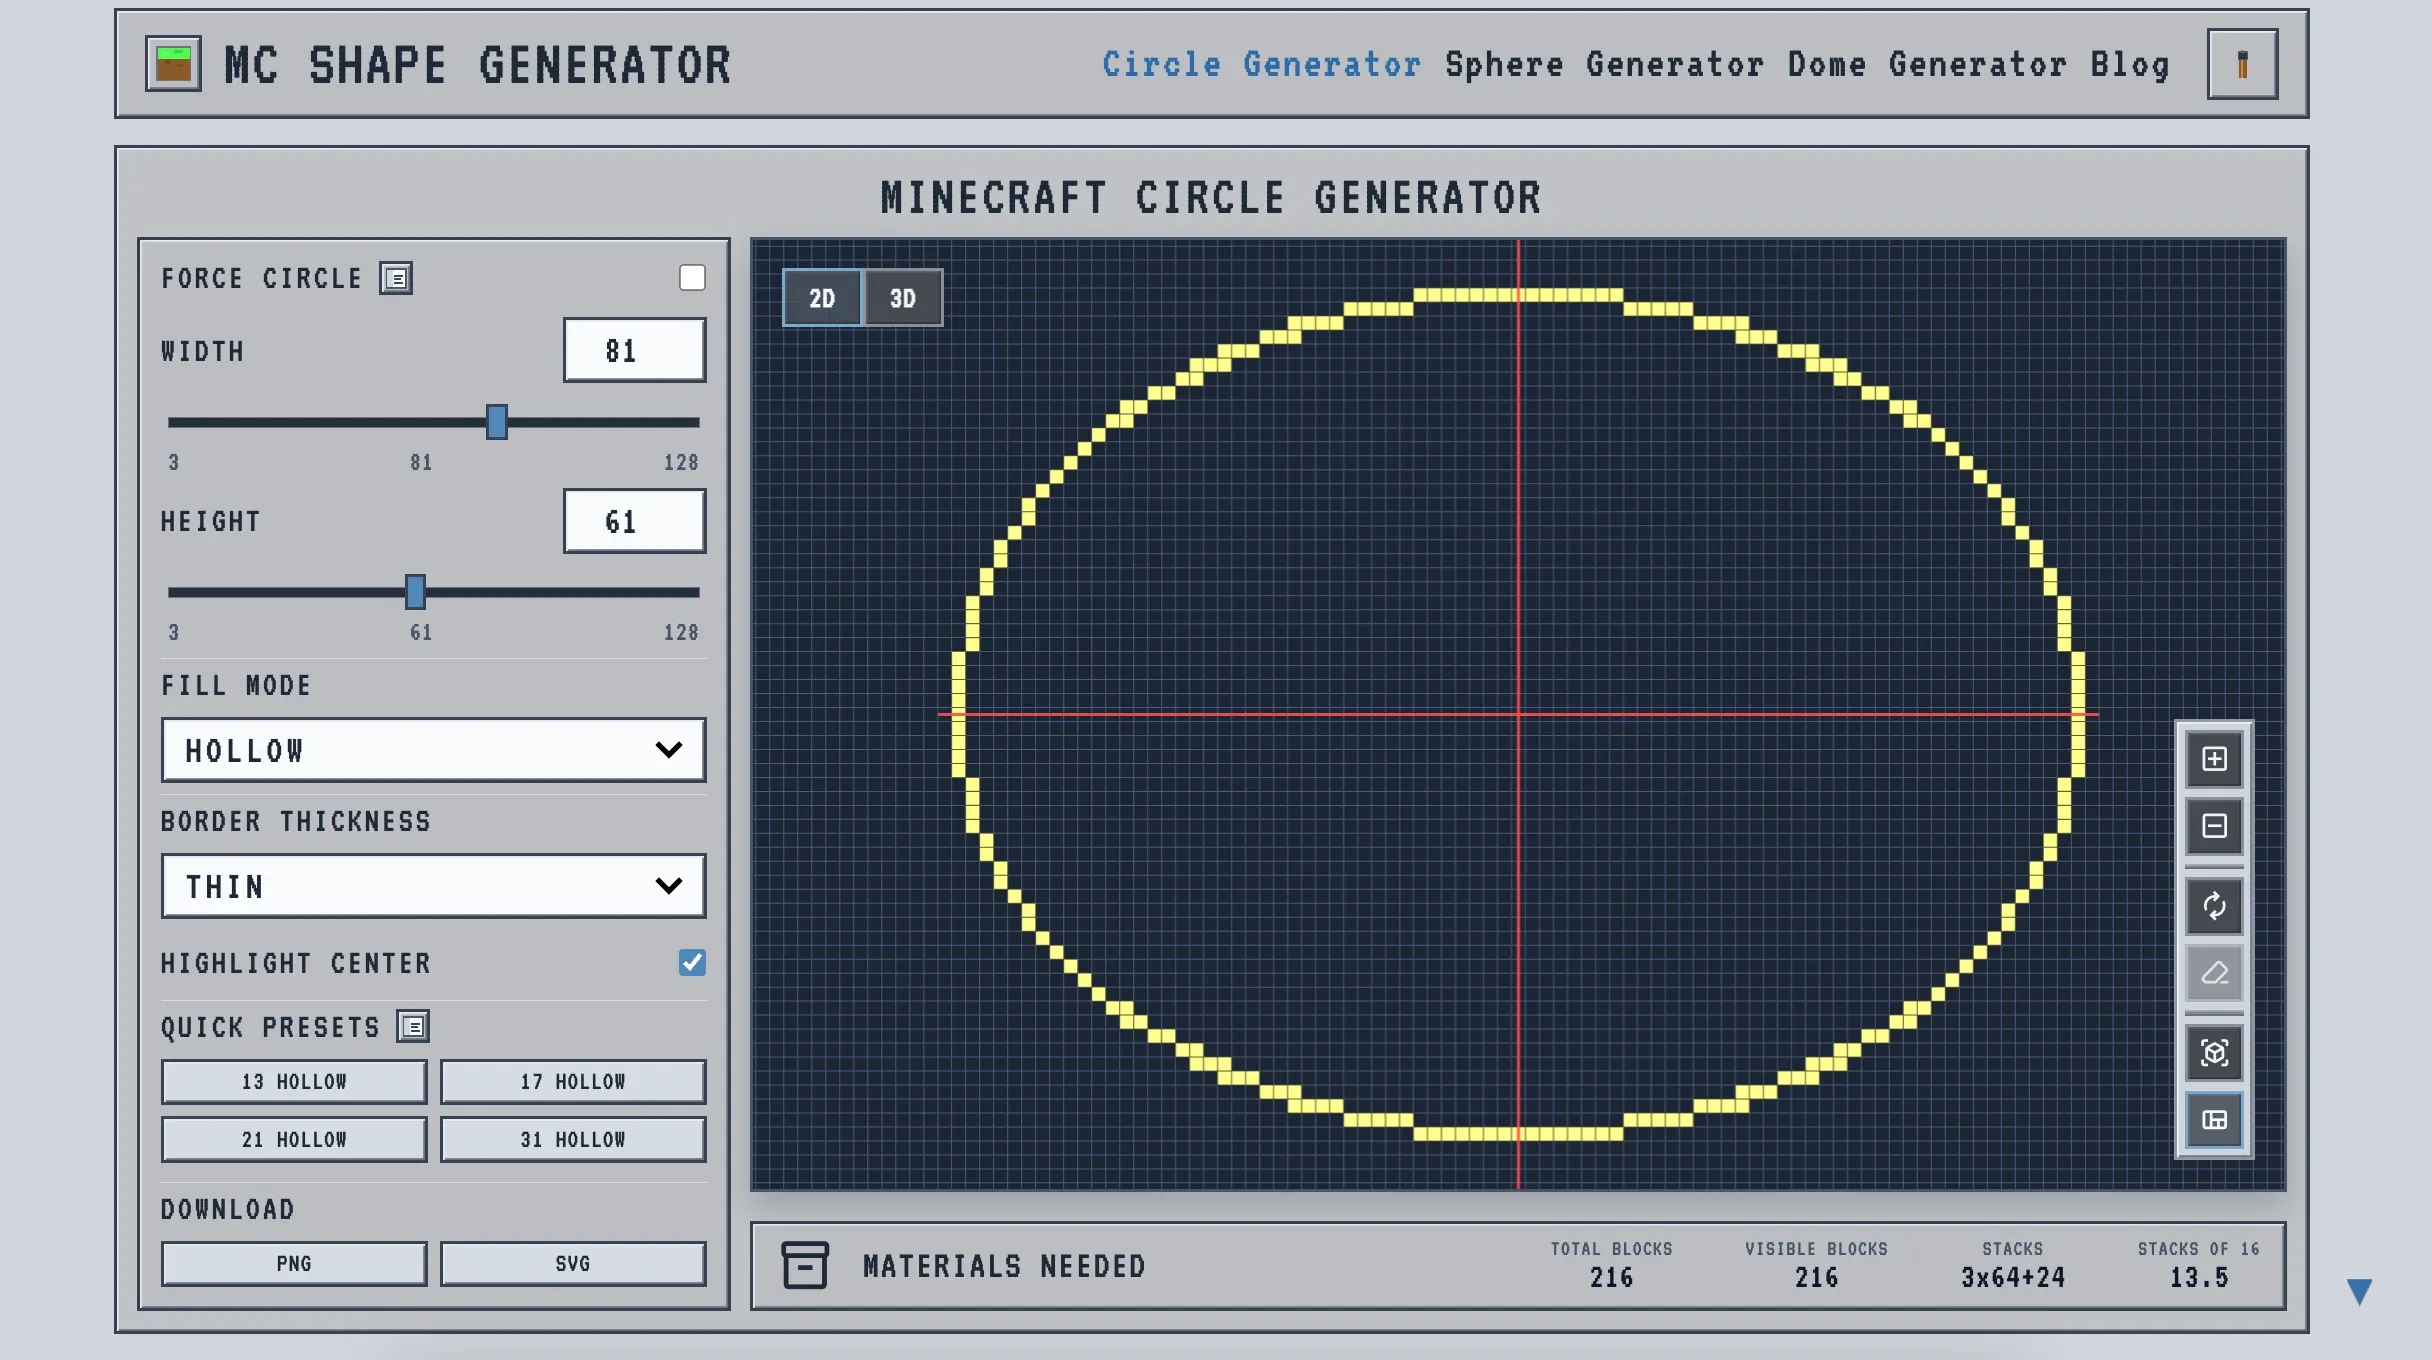
TL;DR: A Minecraft colosseum is an oval, not a circle. Plot the footprint on the oval generator (try 81×61), step concentric seating rings up and out from it, then carve the arches by hand. The generator draws every ellipse and counts the blocks.
Table of contents
Open Table of contents
It’s an oval, not a circle
The one thing that makes an arena read as Roman is the oval. A perfect circle looks like a fishbowl; the elongated shape is what the eye recognizes as a colosseum. The real one runs about 1.3 to 1 — longer than it is wide — and every seating bank follows that ellipse the whole way around. Stretch it too far and it reads as a stadium; round it toward a circle and it reads as a tower base — the Roman silhouette lives in a narrow window between the two.
That shape is also what makes it hard to lay out. A circle has a single radius you can pace off; an oval has two, and the curve pulls tighter at the narrow ends. Trust your eyes and the far end closes short, the seating rings stop running parallel, and the bowl ends up visibly lopsided. Plotting the ellipse exactly is the job the oval generator was built for — give it a width and a height, and it draws the true curve instead of a stretched-circle guess.
Start with one big ellipse for the footprint
Everything keys off the outer ellipse, so plot that first. Open the Minecraft Oval Generator and set Width and Height apart — 81 by 61 gives a roomy arena with depth to spare for seating. Keep both numbers odd and you get a clean single-block center on each axis to mirror off; the panel returns the exact ring and the block total, so the outer wall’s cost is settled before you mine a thing.
Lay that ellipse on the ground as your master outline. Every later piece — the seating inside it, the wall rising off it — references this one shape. Switch on Highlight Center and the crosshair marks your long and short axes; you’ll lean on those two lines to keep every inner ring honest.
Pick a size before you commit
Three footprints cover almost everything people actually build. A small colosseum at 41×31 is a weekend project — four or five seating tiers and a couple thousand blocks for the wall, the right call for a survival server’s PvP pit where nobody wants to mine for a week. The mid-size 81×61 used through this guide is the sweet spot: deep enough for eight-plus tiers and a proper arched façade, still something one person can finish without it turning into a second job.
Go up to 121×91 and you’re in landmark territory — the build that anchors a whole server spawn. Past that you hit the generator’s 128 cap, and the survival cost turns brutal, so even full-scale attempts usually stop here instead of chasing the real 188. Whatever you pick, plot it once on the oval generator and read the block count first: jumping from 41 to 81 isn’t twice the stone, it’s closer to four times — better to know that now than halfway up the wall with the quarry already empty. Size drives the details too: a 41 bowl wants thin two-block seating and a single arcade level, while an 81 carries the double-tier arches that actually look Roman.
The seating bowl is just concentric rings
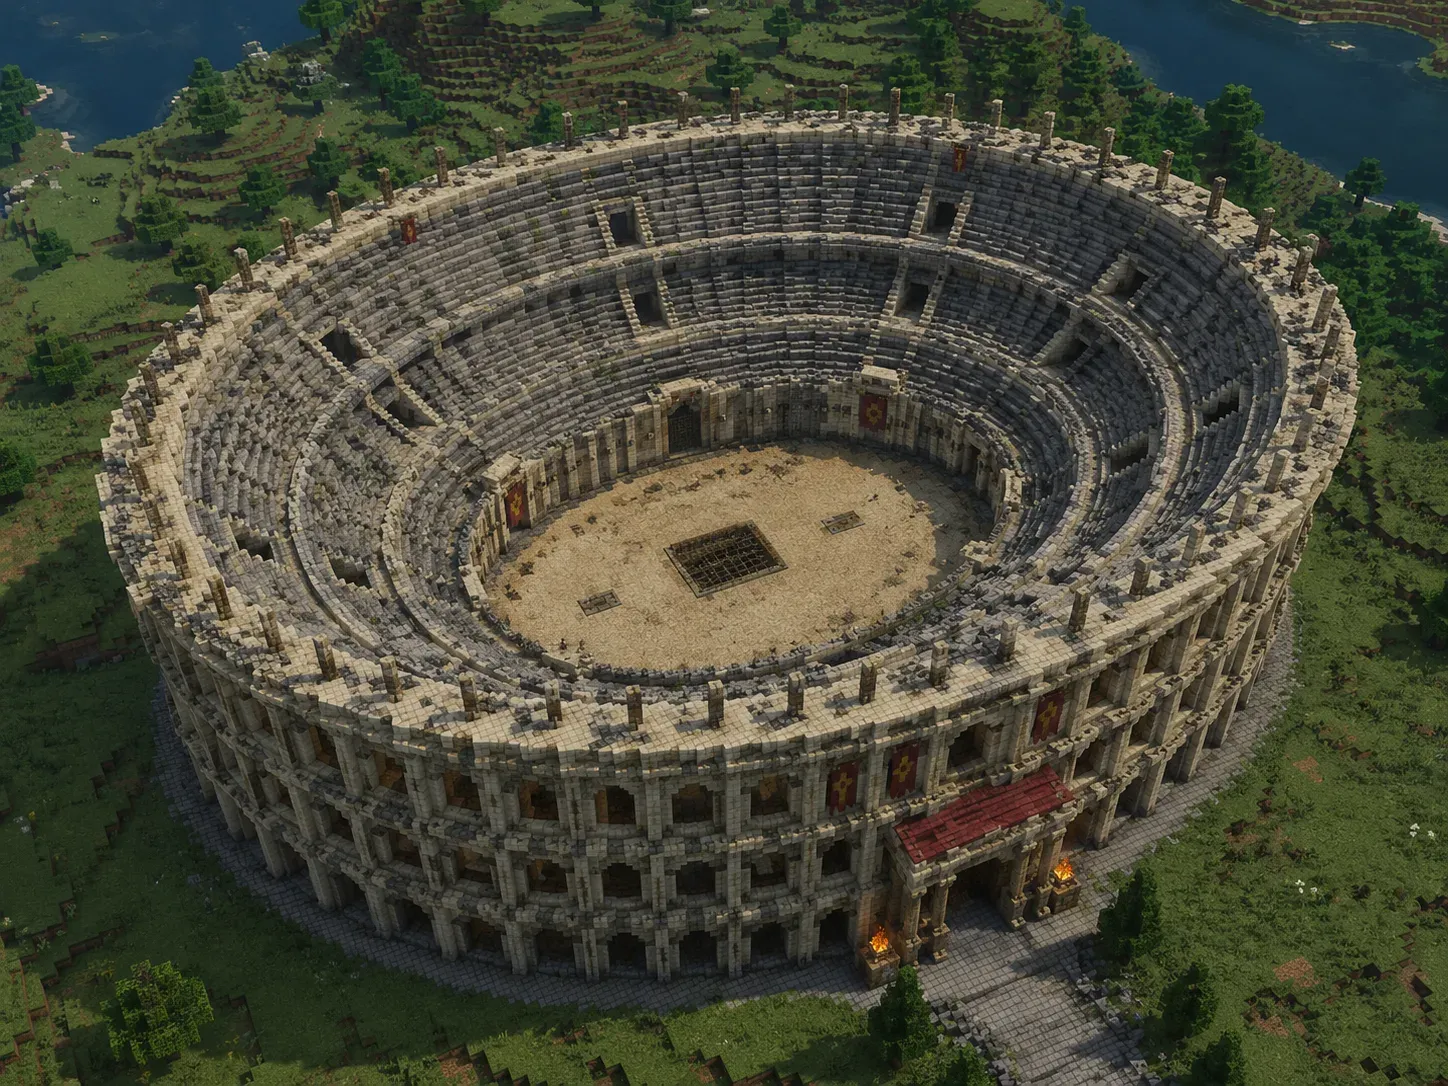
Roman seating is a bowl — tier after tier stepping up and back from the sand. In Minecraft that’s a stack of concentric ellipses, each slightly smaller and a few blocks higher than the last. Drop a 71×53 ring inside the 81×61, then 61×45 inside that, lifting each by two or three blocks; the gap between rings sets how deep each row of seats sits.
Drift is the enemy here. Eyeball each inner ellipse and they wander off-center, so the bowl looks buckled from the stands. Pin them to one shared center instead — the axis method for giant circles works the same on ovals, locking the four cardinal points to a single crosshair so each ring lands concentric with the one beneath it. Eight to fifteen tiers reads as a true amphitheater; much fewer and you’ve built a sunken pit. Stagger the vertical rise a little on the long ends and the bowl feels less like a layer cake and more like stone that was quarried into place.
The seats themselves can stay simple — slabs along each tier read as stone benching without draining your block budget. For the authentic touch, cut vomitoria into the bowl: short stair tunnels punching through the seating from outside, the way real crowds funneled in and out, each one interrupting just a few rings on the axes you already locked. Light it before you call the bowl done — sea lanterns sunk under the lip of each tier wash the seating in an even glow at night without a single visible torch. Skip that pass and a night render turns the whole colosseum into a black hole with a wall around it.
Roman arches are a manual job
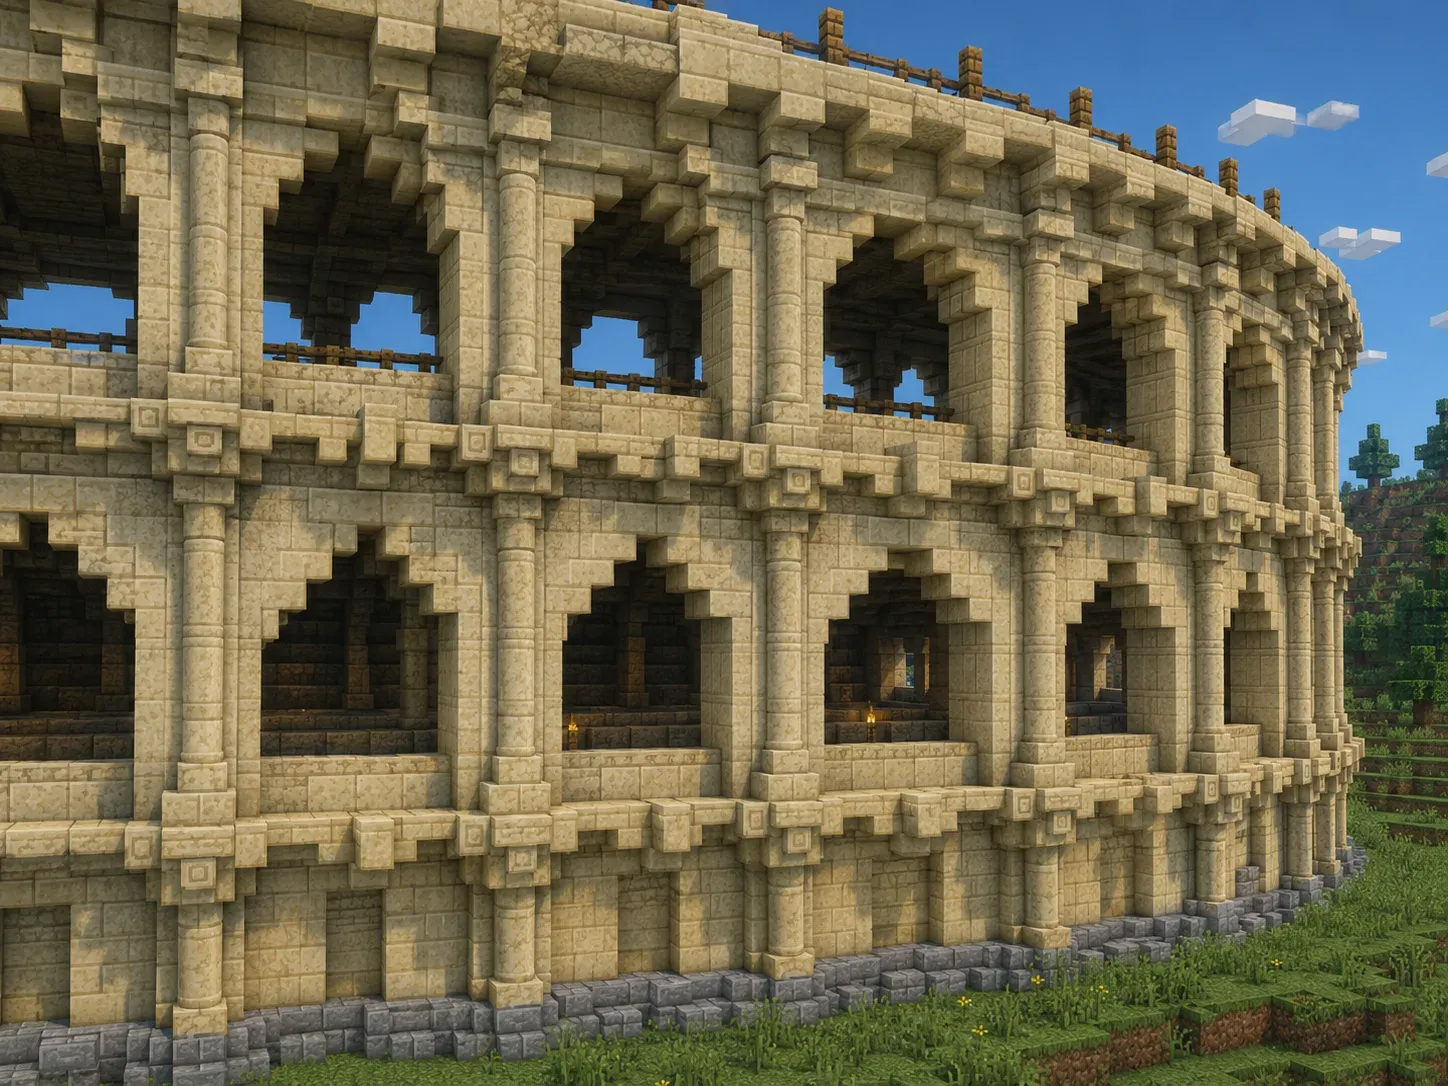
This is where the generator hands off to you. The arched façade — the part that actually says “Colosseum” — isn’t something the tool plots; there’s no arch or arcade mode, and pretending otherwise would be a lie. You raise the ellipse wall off the footprint, then cut repeating arches into it by hand, usually upside-down stairs for the curve with a column between each bay.
Space the arches off the footprint’s block count: split the perimeter into even segments so they come out regular instead of leaving a squashed one at the back. Stacking two or three arcade levels — arches above arches — is what gives the real building its height, and the stone-and-stair detailing from the castle round tower guide carries straight onto the columns and capitals. Vary the block palette by level if you want the weathered look — smooth stone low, sandstone up top, a band of stair trim between them.
The arch spacing is the one number worth doing by hand. Take the outer ring’s block count, divide by the bay width you want — a 5-wide arch plus a 2-wide column makes a 7-block bay — and round to whole bays so the pattern closes evenly at the back. Get the division right and the arcade marches around the oval without a cramped opening anywhere; get it wrong and there’s always one squashed half-arch hiding where you hope nobody looks.
The floor, the gates, and the spina
The arena floor is the innermost ellipse left open — sand laid over a hollow understructure if you want the trap-door look, since the real one hid a whole maze of tunnels and lifts beneath the sand. Two gates on the long axis break the lowest seating ring and line up with the center lines you already marked, so fighters enter dead on the spine of the build.
Building a circus for chariot racing instead of a gladiator pit? Run a spina down the long axis — the low central wall the track loops around. It’s just one more very thin ellipse plotted inside the floor. Same tool, same crosshair, same workflow as every ring above it, which is the quiet advantage of laying the whole thing out as nested ellipses: nothing you add later has to be guessed.
How big you can actually go
One honest limit: the real footprint is about 188×156, and the generator caps each axis at 128. For a true 1:1 you’d plot the shape in sections or accept a slightly smaller scale — an 81×61 or 121×91 colosseum reads completely right and stays in range. Most builds look better scaled down regardless; a 188-block oval is a hundred-hour survival haul that few people ever finish.
Materials come down to the outer wall, which is the real expense. Plot it hollow, read the per-ring block count off the panel, and multiply by wall height — an 81×61 ring eight blocks tall is the line between a weekend build and a server project. Sandstone, smooth stone, and stone brick are the classic palette; the Minecraft Circle Generator gives the count for every tier, so you can pre-farm the whole bowl before laying the first seat.
Lay it out as an oval from the first block and it’ll read as Roman from clear across the map — the natural centerpiece for a circular mega base if you keep building outward. Lay it as a circle and no amount of arches will save the silhouette, which is the one part the tool makes impossible to get wrong.